Restoring a backup from a ZIP file – like the ones generated by our downloadable backup feature – can sometimes be a lengthy process. If you unzip a ZIP file locally on your computer before uploading the backup with SFTP, you’ll likely run into a bottleneck because SFTP can only transfer a limited number of files concurrently.Try a free demo
Fortunately, there is a faster method that can reduce the backup restore time significantly.
Instead of unzipping a ZIP file locally and uploading the unzipped folder, it’s often faster to upload a ZIP file to the server before unzipping it.
In this post, we’ll explain how to unzip a file uploaded to a server using SSH. For our example, we will unzip a backup file on a Kinsta server, but the same technique can be used to unzip any ZIP file on any Linux server.
Table of Contents
- Step 1 – Log In to Your Server with SSH
- Step 2 – Install the Unzip Package (Optional)
- Step 3 – Unzip the ZIP File Using Terminal
Step 1 – Log In to Your Server with SSH
The first step is to log in to your server with SSH. To do this, you’ll need an SSH client like the built-in Terminal app in macOS and Linux or the free PuTTY client on Windows, and the SSH login details – IP address, username, password (optional), and port.
Password vs Public Key Authentication
You may be wondering why the password is optional. When logging in to your server with SSH, there are two authentication methods – password and public key authentication. The password authentication method uses a plain text password.
Public key authentication is widely regarded as a more secure alternative to password authentication. The public key authentication method requires you to generate a key pair – public key and private key. The public key is uploaded to the server, while the private key is stored locally on your computer. During the SSH login process, the cryptographic link between the two keys is verified to authenticate the user.
Kinsta users can upload SSH public keys in the MyKinsta dashboard. If you are using another server provider, we recommend taking a look at the relevant documentation on how to upload SSH keys to the server.
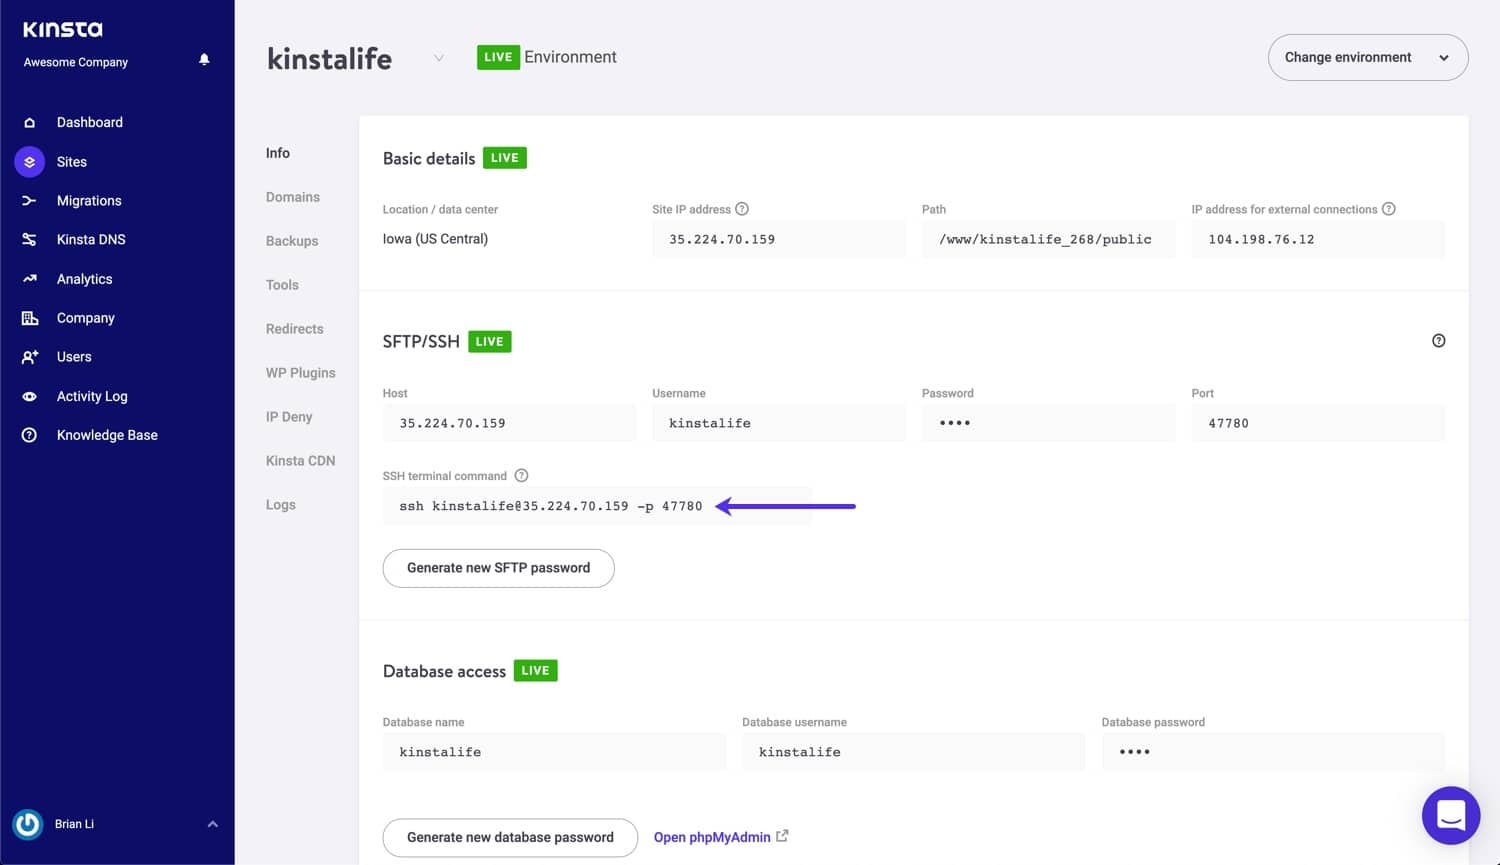
Now that we’ve covered the differences between password and public key authentication, let’s move on to the SSH login process. For Kinsta users, SSH login details along with the full SSH terminal command are provided in the MyKinsta dashboard.

SSH terminal command in MyKinsta.
If you are using another web host or server provider, the SSH details can typically be found in your dashboard as well.
After you have found the login details, you can log in with the following SSH command.
ssh username@ip-address -p portWith the example login details below, the SSH terminal command would be ssh kinstasite@146.148.59.197 -p 24910.
If you are not using public key authentication, you will also be
prompted for the SSH password after executing the login command.
- IP Address: 146.148.59.197
- Username: kinstasite
- Port: 24910
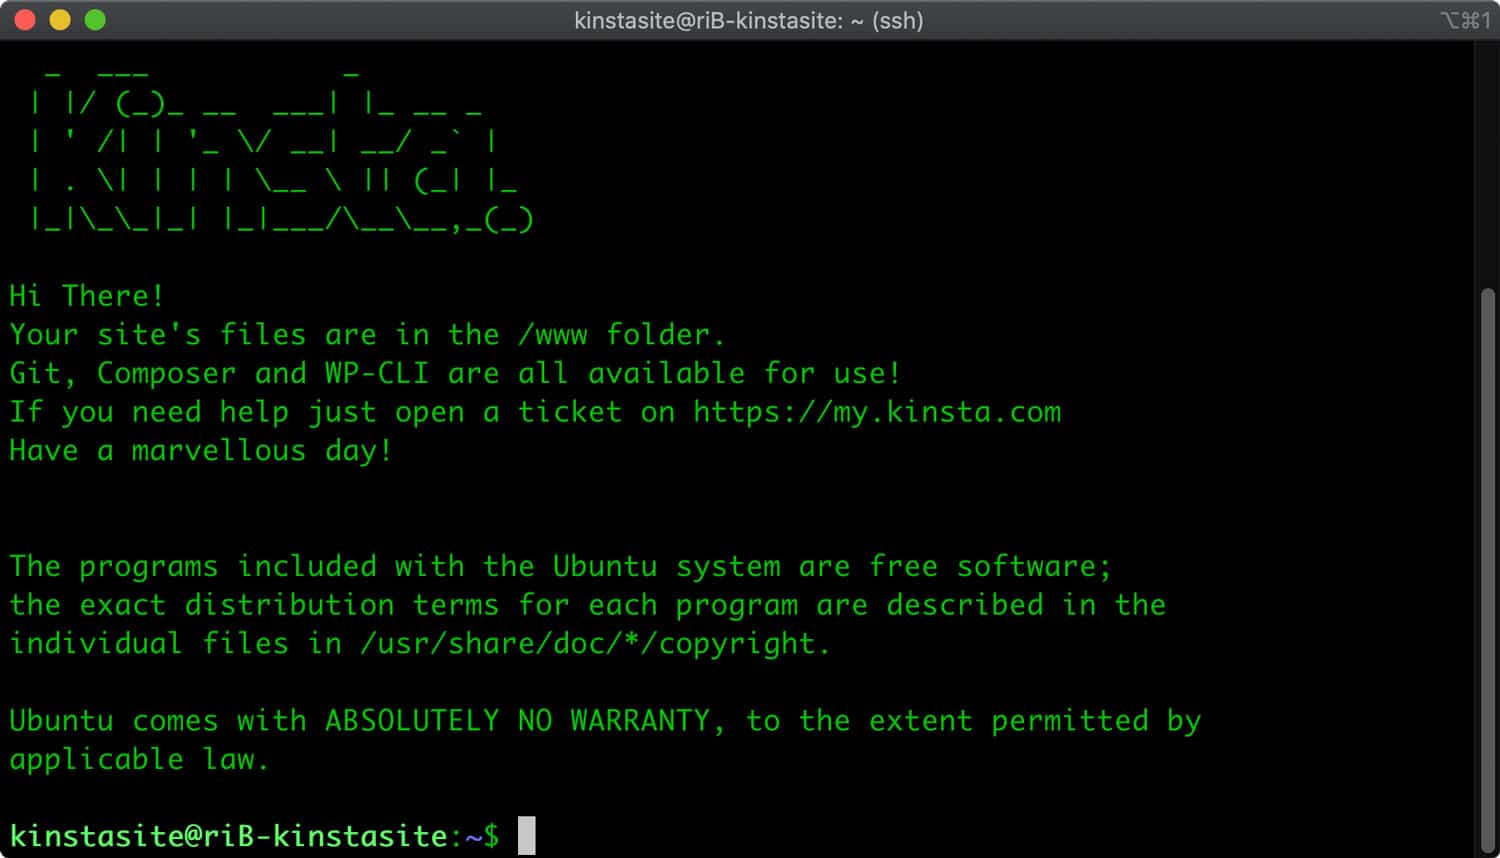
After a successful SSH login, you should see something like this in your Terminal window.

SSH terminal window.Trying to restore a backup from a ZIP file? 🤐 Unzipping via SSH is your new secret weapon 🚀Click to Tweet
Step 2 – Install the Unzip Package (Optional)
In some Linux distributions, the unzip package is not installed by default. Kinsta users do not have to worry about installing the unzip package because it is automatically installed on all our site containers. If you are managing a server that does not have the unzip package installed, you can use the following command to install it – note that sudo level permissions are required.
Ubuntu and Debian
`sudo apt install unzip`
CentOS and Fedora
`sudo yum install unzip`
Want to know how we increased our traffic over 1000%?
Join 20,000+ others who get our weekly newsletter with insider WordPress tips! Subscribe Now
Step 3 – Unzip the ZIP File Using Terminal
The next step is to navigate to the ZIP file and unzip it. To navigate to the correct folder, we can use the cd command, as shown below.
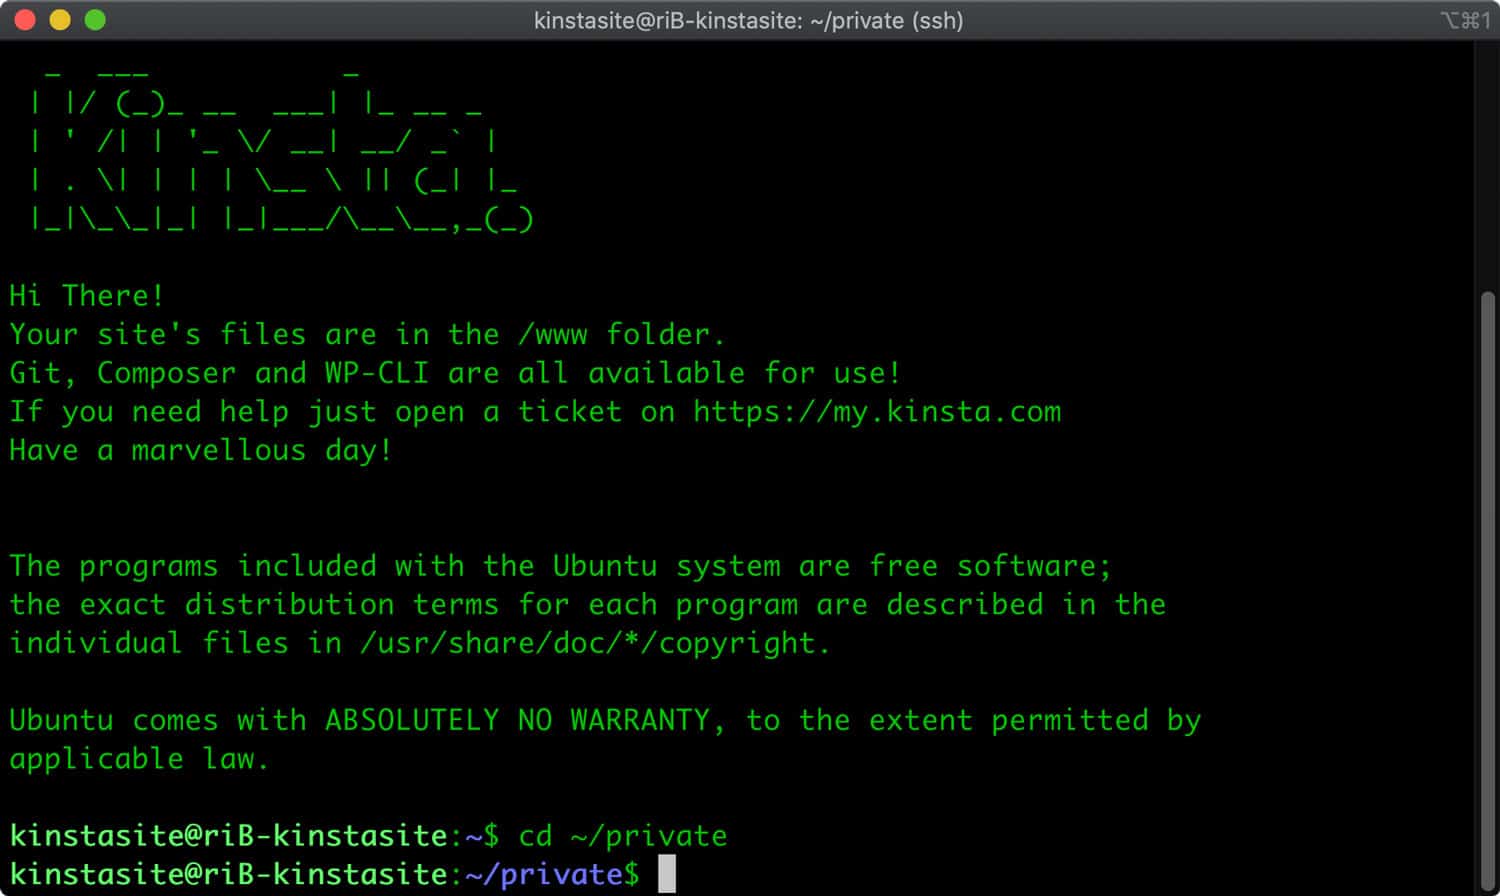
cd directoryWe uploaded our backup.zip file to the ~/private directory, so we’ll use the command below.
cd ~/privateNotice how our Terminal prompt shows the ~/private directory now.

Navigate to the directory containing your ZIP file.
We can use the ls command to list the files and folders in the current directory. In the screenshot below, you can see the backup.zip file in our ~/private directory.
Need a blazing-fast, secure, and developer-friendly hosting for your client sites? Kinsta is built with WordPress developers in mind and provides plenty of tools and a powerful dashboard. Check out our plans

List files in Terminal.
There are two ways to unzip a ZIP file. You can either unzip it to the current directory or a different directory.
To unzip the file to the current directory, use the command below.
unzip your-file.zipTo unzip the file to a different directory, use this command instead.
unzip your-file.zip -d directoryFor our backup.zip file, we want to unzip it to our ~/public folder, which can be done with the command below.
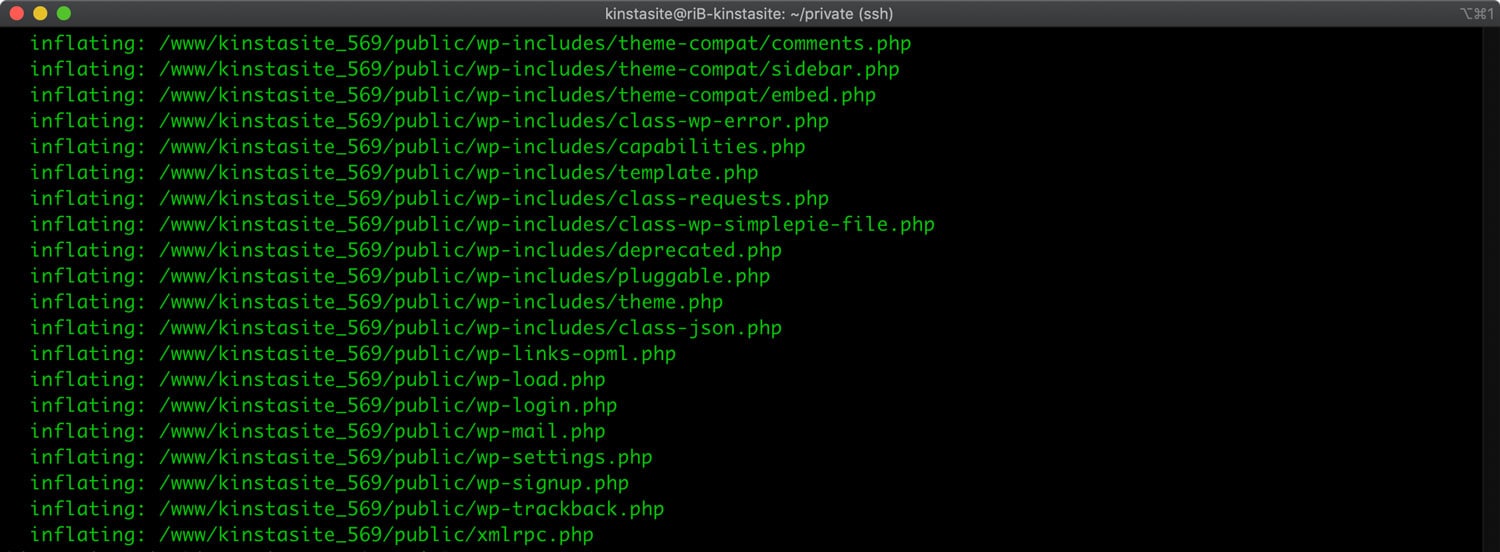
unzip backup.zip -d ~/publicAfter running the unzip command, you should see a series
of lines that start with “inflating”. This indicates that the unzip
process was started successfully.

Unzip files in Terminal.
After the unzip process is finished, navigate to the destination directory with the cd command, and list out the files with the ls command to verify the unzipped files are in the right place.

Verify unzipped files.
If you would like to remove the original ZIP file after unzipping it, you can use the rm command like this.
rm /path/to/your-file.zipIn general, if you are dealing with a ZIP file that is over 50 MB in size, unzipping it on the server instead of locally on your computer will usually be faster. But there’s more to unzipping ZIP files as using SSH and Terminal is useful for a number of use cases beyond restoring backups.There’s an easier (and faster!) way to restore backups from ZIP files… ⚡️Click to Tweet
Summary
Being able to unzip a ZIP file in Terminal using SSH can speed up your workflow dramatically – especially if you are uploading a large number of files in bulk. With the SSH commands listed in this post, you’ll be able to quickly restore backups and move content without waiting for long SFTP uploads.
